AWS EC2 Instance Reachability Check FAILED
I have an issue with one of my EC2 instances in AWS. It was working perfectly for months and I didn't make any changes to instance's setting since the first time I created it. and suddenly I couldn't connect via SSH to it.
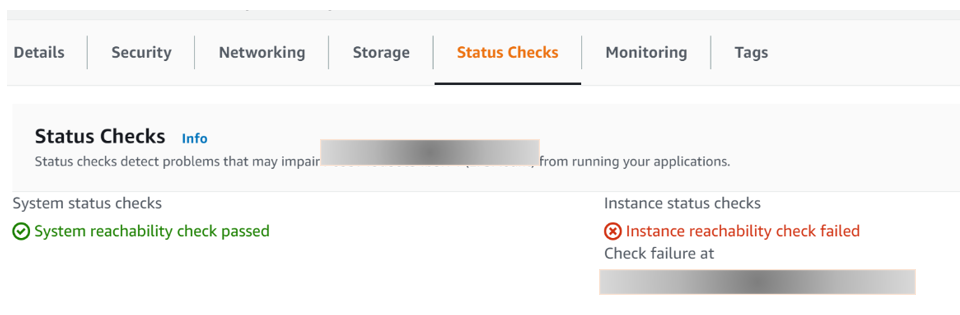
I checked the status check from AWS EC2 console and both System System status checks and Instance status checks passed.
I checked the system log and couldn't find anything that can help me identify the issue. I could see the the CPU usage is getting high from monitoring dashboard, and I still couldn't do anything because I can not connect to my instance.
I spent 5 hours to check on internet what could be the solution for the issue. please note that both both System System status checks and Instance status checks passed. and I refreshed the page regularly.
and then suddenly I got "reachability check failed" under instance status check , (what took you so long to notify me this, AWS? ).
this information gave me clue what could be the issue and how to solve it.
I refer to My EC2 Linux instance failed the instance status check due to over-utilization of its resources. How do I troubleshoot this? from AWS knowledge center.
The Solution
Reboot your instance
My EC2 CPU utilization was near 100% , so I tried rebooting the EC2 instance to return it to a healthy status.
and minutes later, everything worked well.
you can refer the the article from knowledge center above it rebooting your instance doesn't solve the issue.
Use a rescue instance
if the first method doesn't solve the issue, you can try use a rescue instance method. Here is the step by step how to follow this method
Launch a new EC2 instance in your VPC using the same Amazon Machine Image (AMI) and in the same Availability Zone as the impaired instance. The new instance becomes your rescue instance.
- Stop your impaired instance.
- Detach the EBS root volume from your impaired instance.
- Attach the EBS volume as a secondary device to the rescue instance.
- Connect to your rescue instance using SSH.
- Create a mount point directory (/rescue) for the new volume attached to the rescue instance.
- Mount the volume at the directory that you created in step 6.
- Unmount the secondary device from your rescue instance.
- Detach the secondary volume (/dev/sdf) from the rescue instance. Then, attach it to the original instance as /dev/xvda (root volume).
- Start the instance and then check if the instance is responsive.
Good Luck